Easy Pumpkin Napkin Fold for Thanksgiving
Published on
November 11, 2022 at 12:47:46 PM PST November 11, 2022 at 12:47:46 PM PSTth, November 11, 2022 at 12:47:46 PM PST
Leaves are changing into beautiful rustic colors, and a lingering smell of pumpkin spice emerges with a chilling breeze; the eventful Thanksgiving season is nearing. With food prep and party planning, finding time to decorate your home into the perfect autumn atmosphere can be quite troublesome. However, this simple pumpkin napkin fold will take less than two minutes to prepare and instantly adds a trendy charm to any Thanksgiving table setting. The following napkin folding tutorial is a simplistic tabletop idea that results in a stylish seasonal accent to your fall dining room decor.
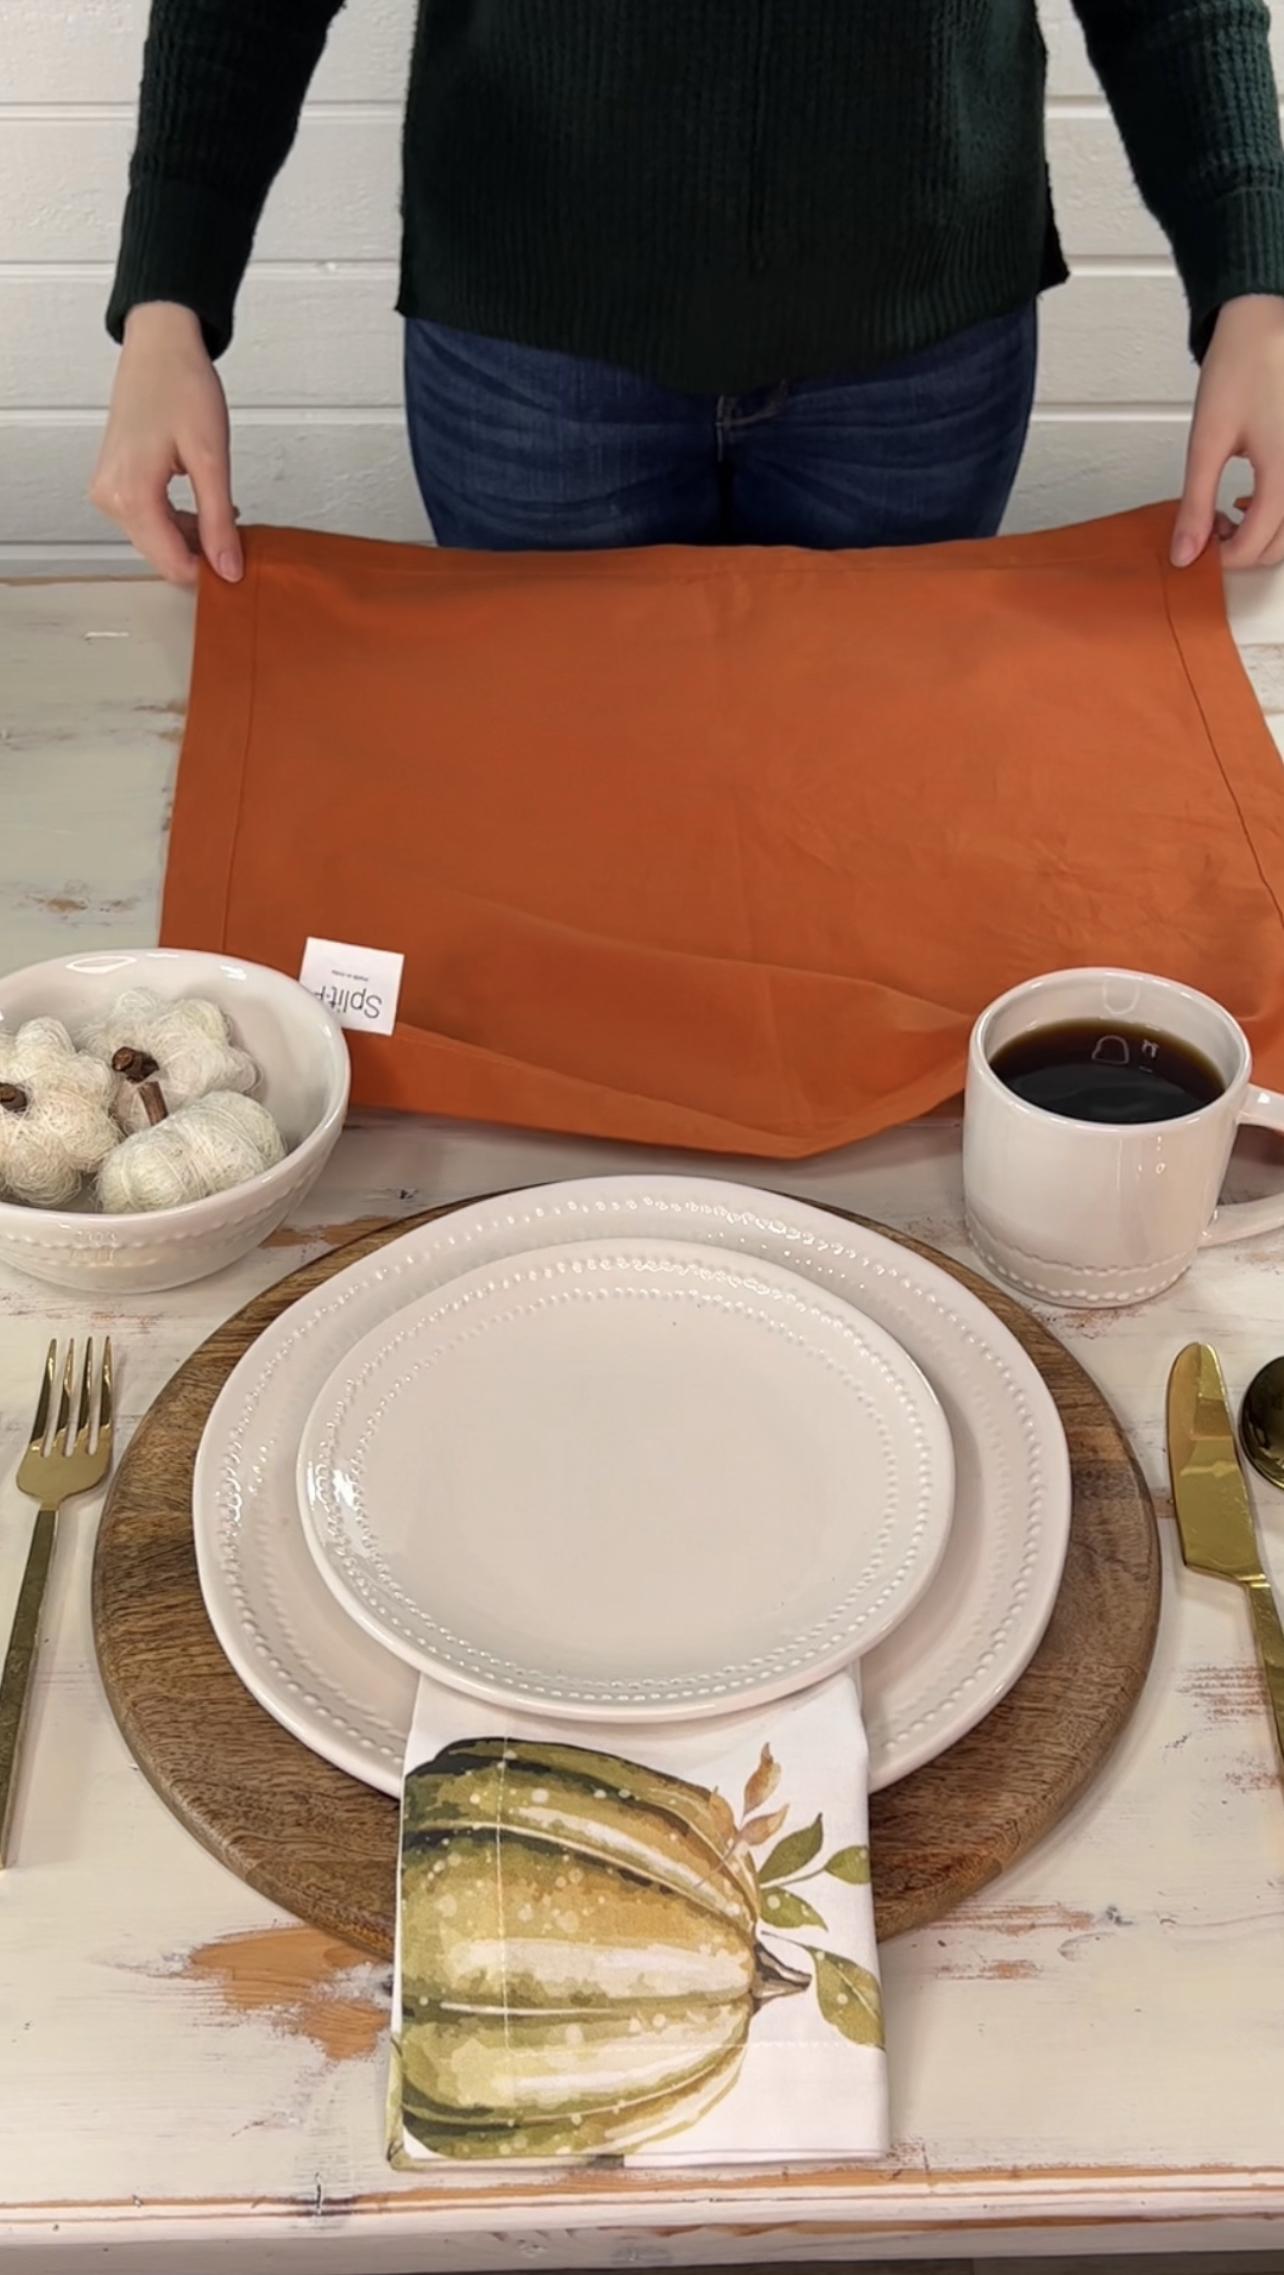
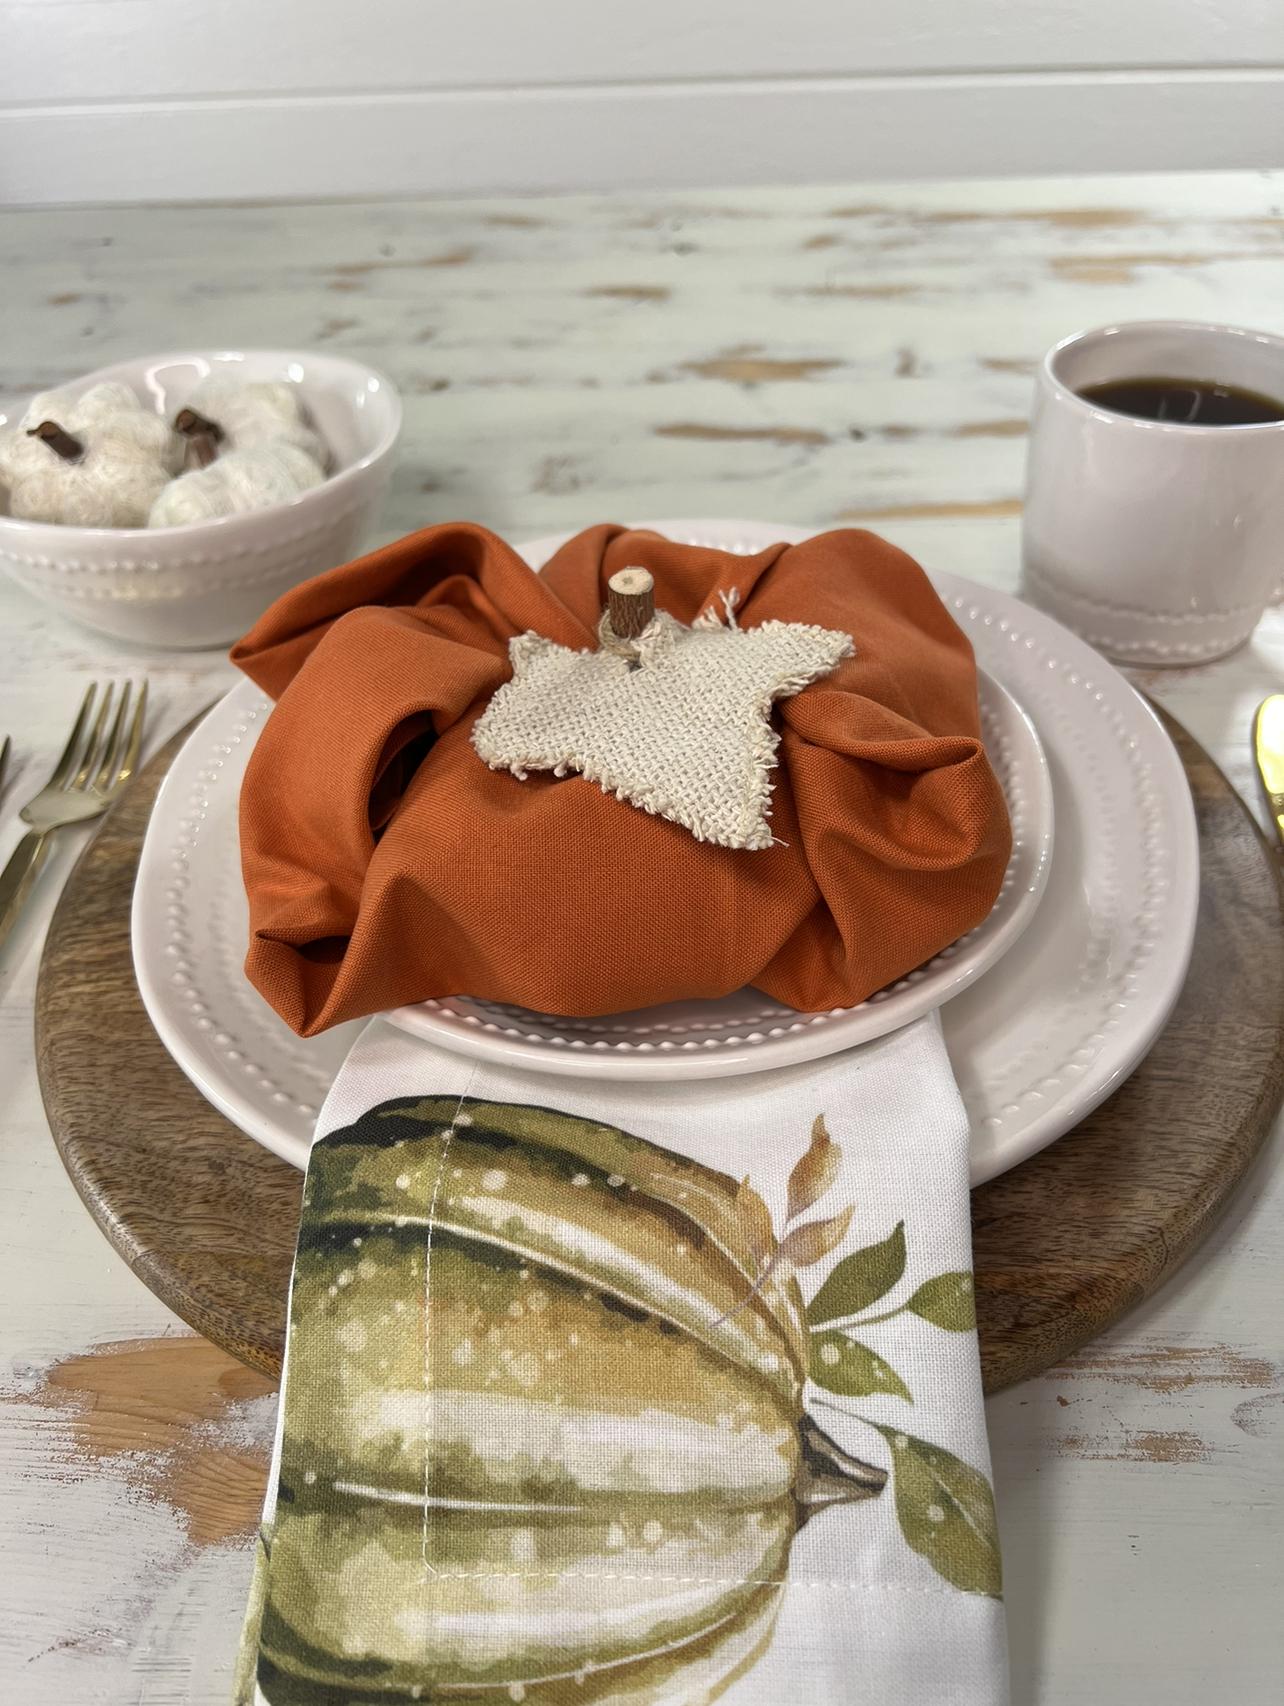
It is recommended that you use a square cloth napkin that has an approximate size of 20” x 20” and a thinner material for a flexible factor; we used our reusable cloth Elements Napkin - Sienna Orange that has both of these aspects. Using a larger sized napkin will provide a fuller look to your DIY pumpkin while the thinner, but not too thin, material will allow a flexible factor to complete the following steps.
Quick tip: if you want to go a traditional route, use an orange napkin. But, for a unique interior style try this with a different colored napkin. For example, we created a non-traditional Thanksgiving table setting setting with a pastel pink pumpkin napkin fold for a trendy chic seasonal twist.
Along with the required cloth napkin, be sure to have either a shortened faux twig, cinnamon stick or a similar piece to act as the peduncle, stem, of the pumpkin. If you’re feeling up for it, add a fake leaf or vine like plant to complete a more realistic approach.
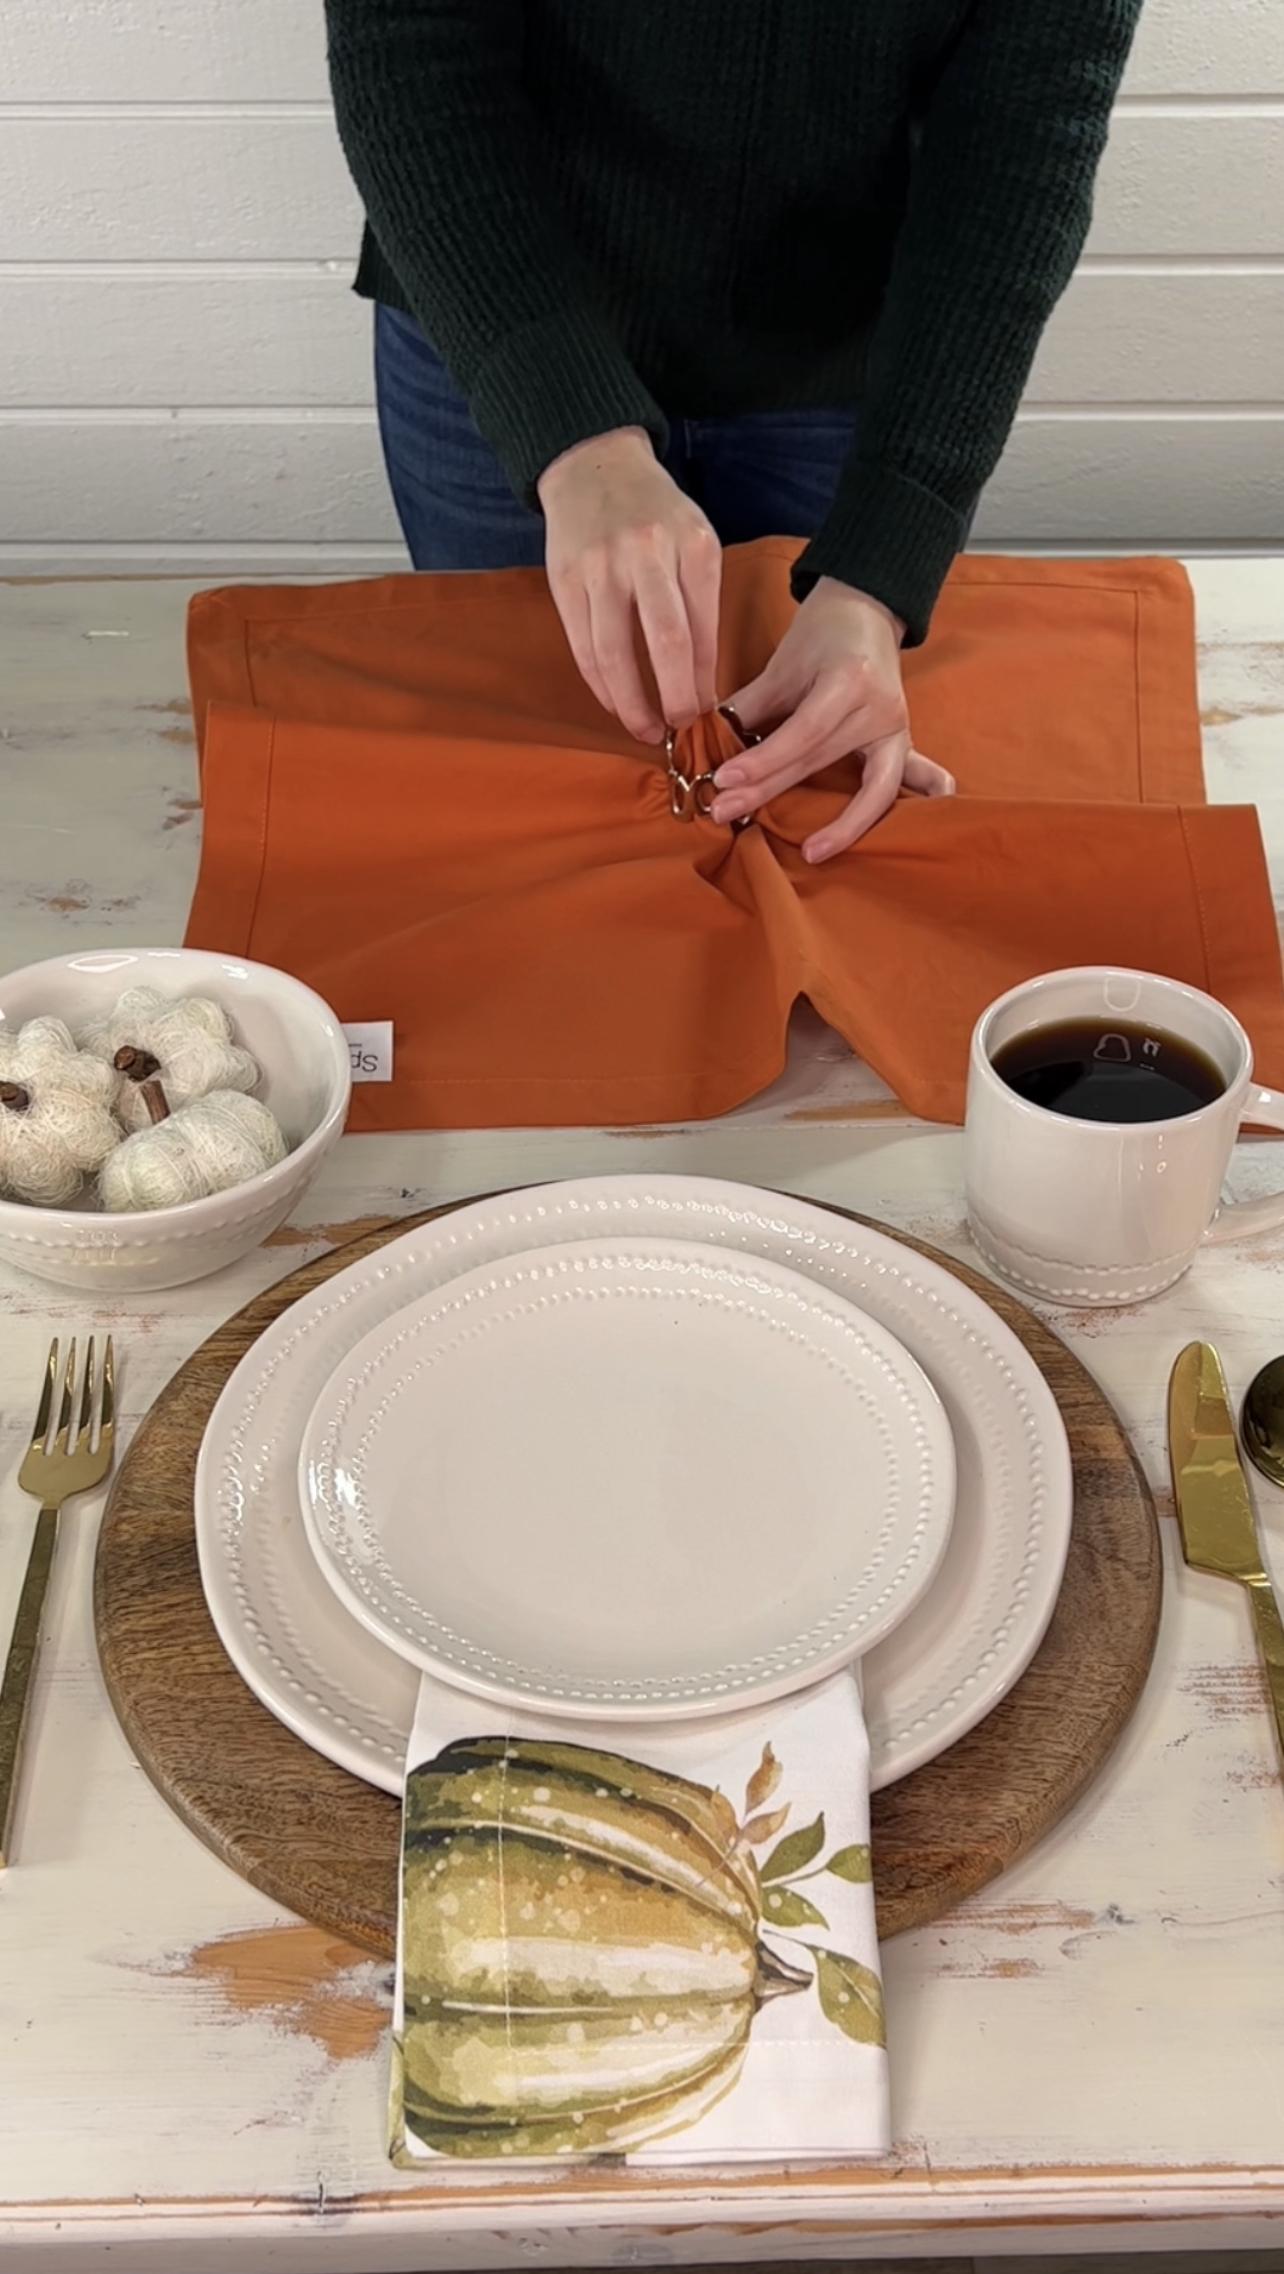
Start out with your square napkin laid out flat on the dining table surface. Simply place a napkin ring of any kind in the center. We used our Split-P Oval Links Napkin Ring, but you can use any kind, as it will not be visually seen in the end.
Next, pinch and softly tug the fabric from the center of the napkin ring and pull it to around the height of the napkin ring. This step will give it a gathered look and keep it all from falling out of place.
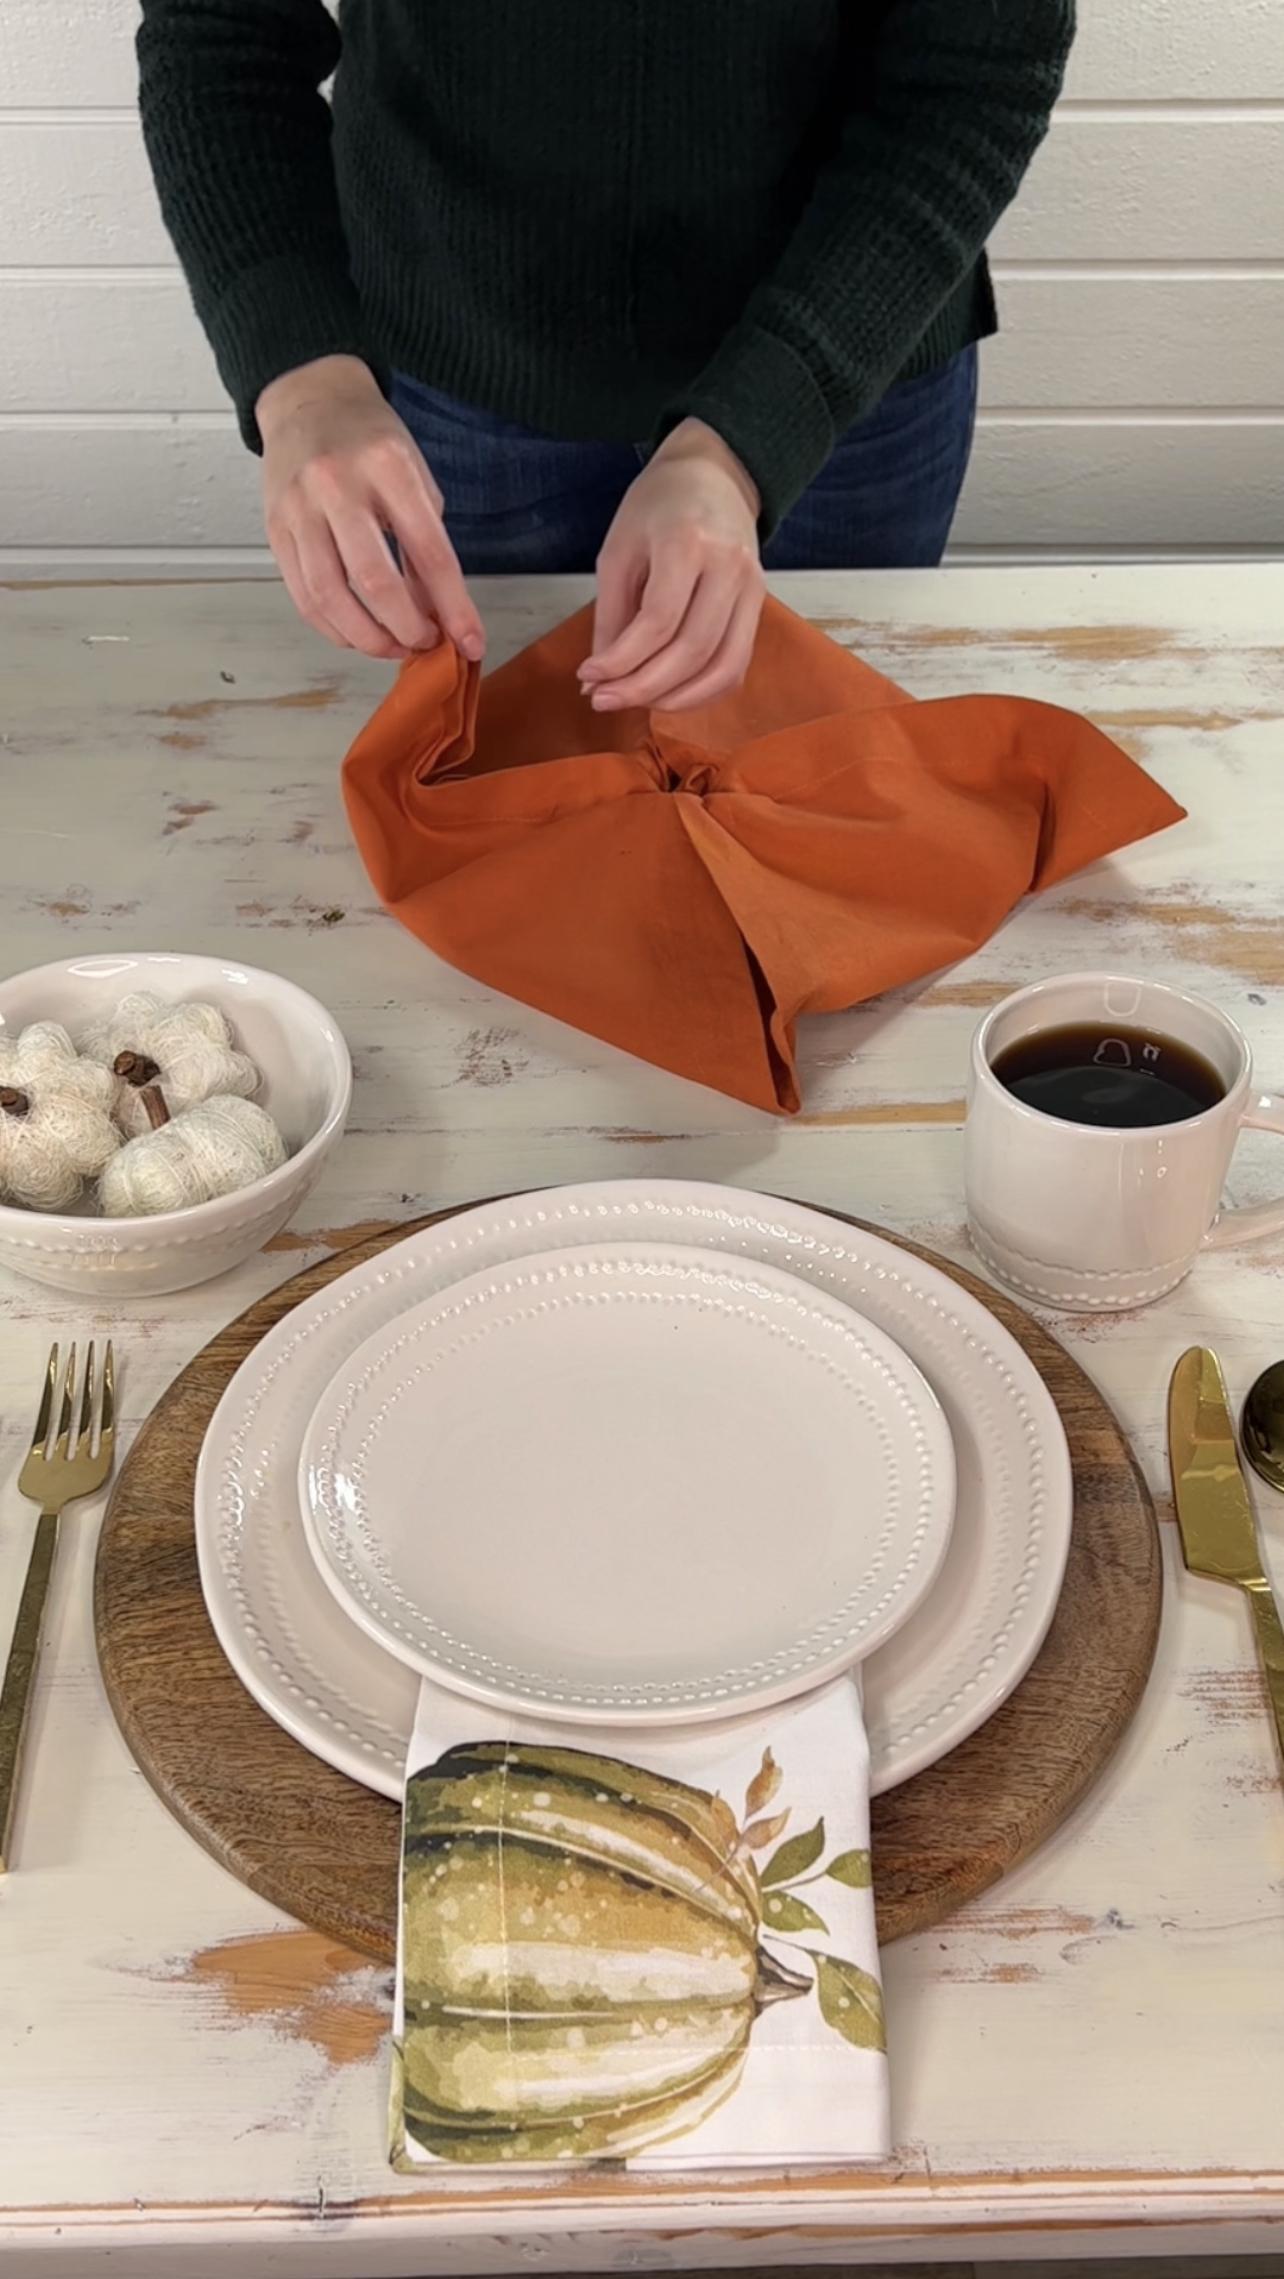
Take one of the four corners and bring it to the middle then tuck it slightly between the holder and the raised material. It does not need to be tucked in all the way, just enough to keep it in place. Repeat this step with the rest of the three corner ends.

Now there will be another set of corners that are created from tucking the prior ones in. Continue to tuck these next four in the center of the napkin ring again, overtop the previously tucked in corners.
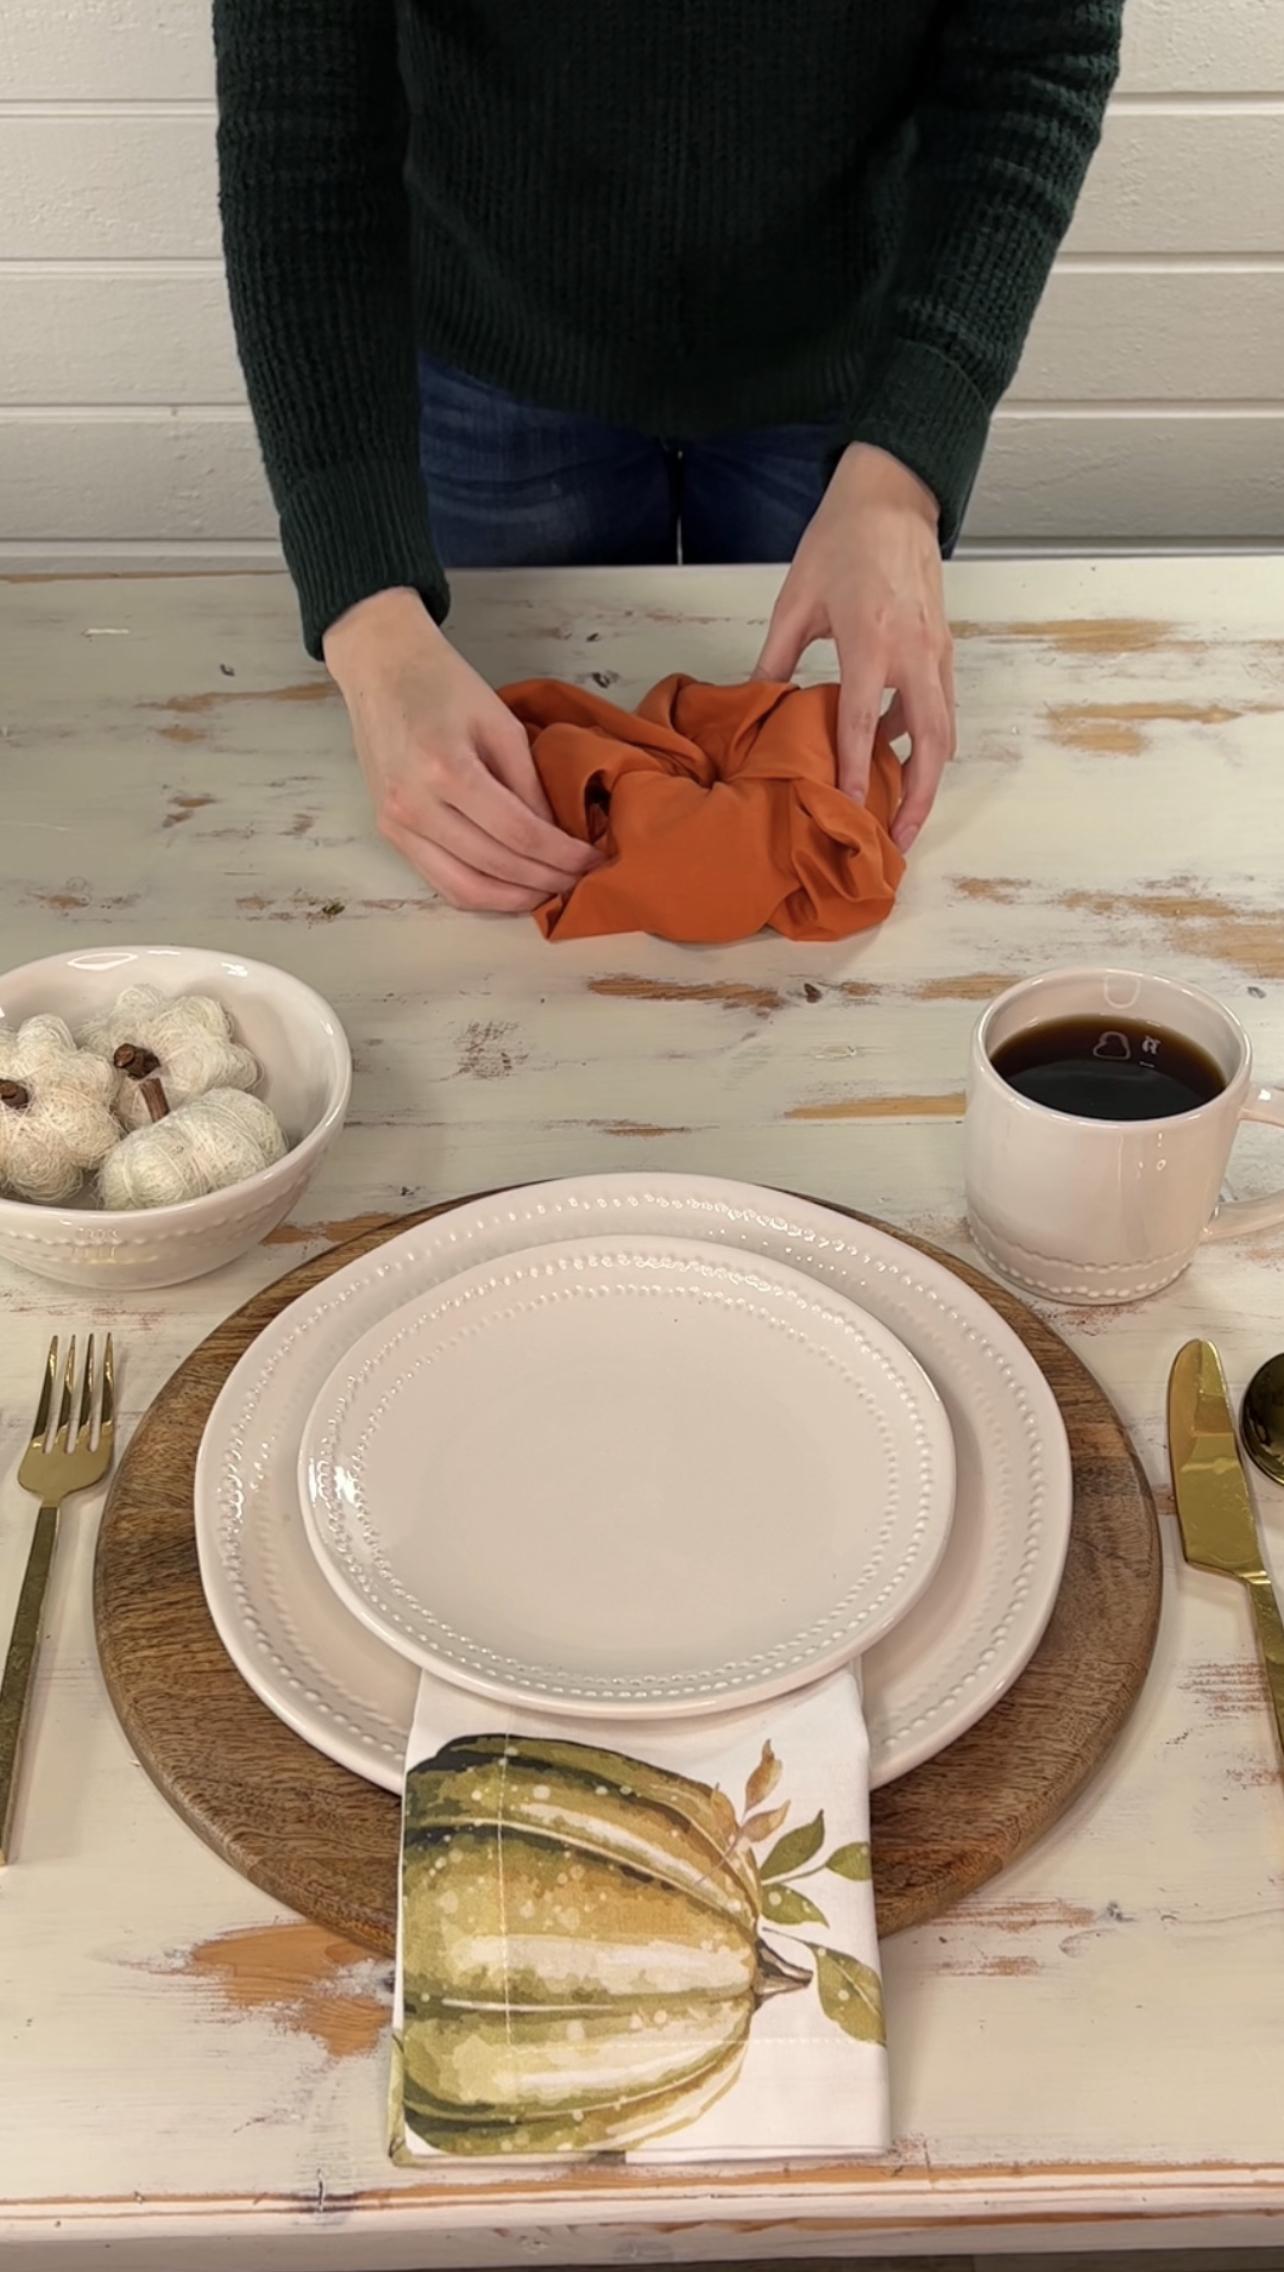
Fluff the sides and top of the pumpkin to get the desired look. We decided to go with a messier styled pumpkin for a stylistic flair on our rustic tablescape. For the final step, take your fake twig or stem and place in the very middle of the pumpkin and hidden napkin ring.
To complete the entire look, we placed the completed pumpkin napkin fold on our Split-P Peyton Dinner Plate and perfectly paired it with a beautifully patterned cloth napkin from our Retro Pumpkin Collection.
Creative yet easy, this gourd-geous napkin fold is now ready to place on a fall table setting for an upcoming friendsgiving or Thanksgiving celebration. Easily reuse this look for next Halloween or autumn to add a personalized touch to your holiday table.
Happy Thanksgiving!